Developer Portal
Table of contents
Introduction
The developer portal is the central management of interface of your integration with us. Among others this is the website you will use to obtain your API keys, so for any integration you will need to register a new account.
Signing up for a new account
To sign up for a new account go to https://developers.transferzero.com/ and click on the “Sign up” button.
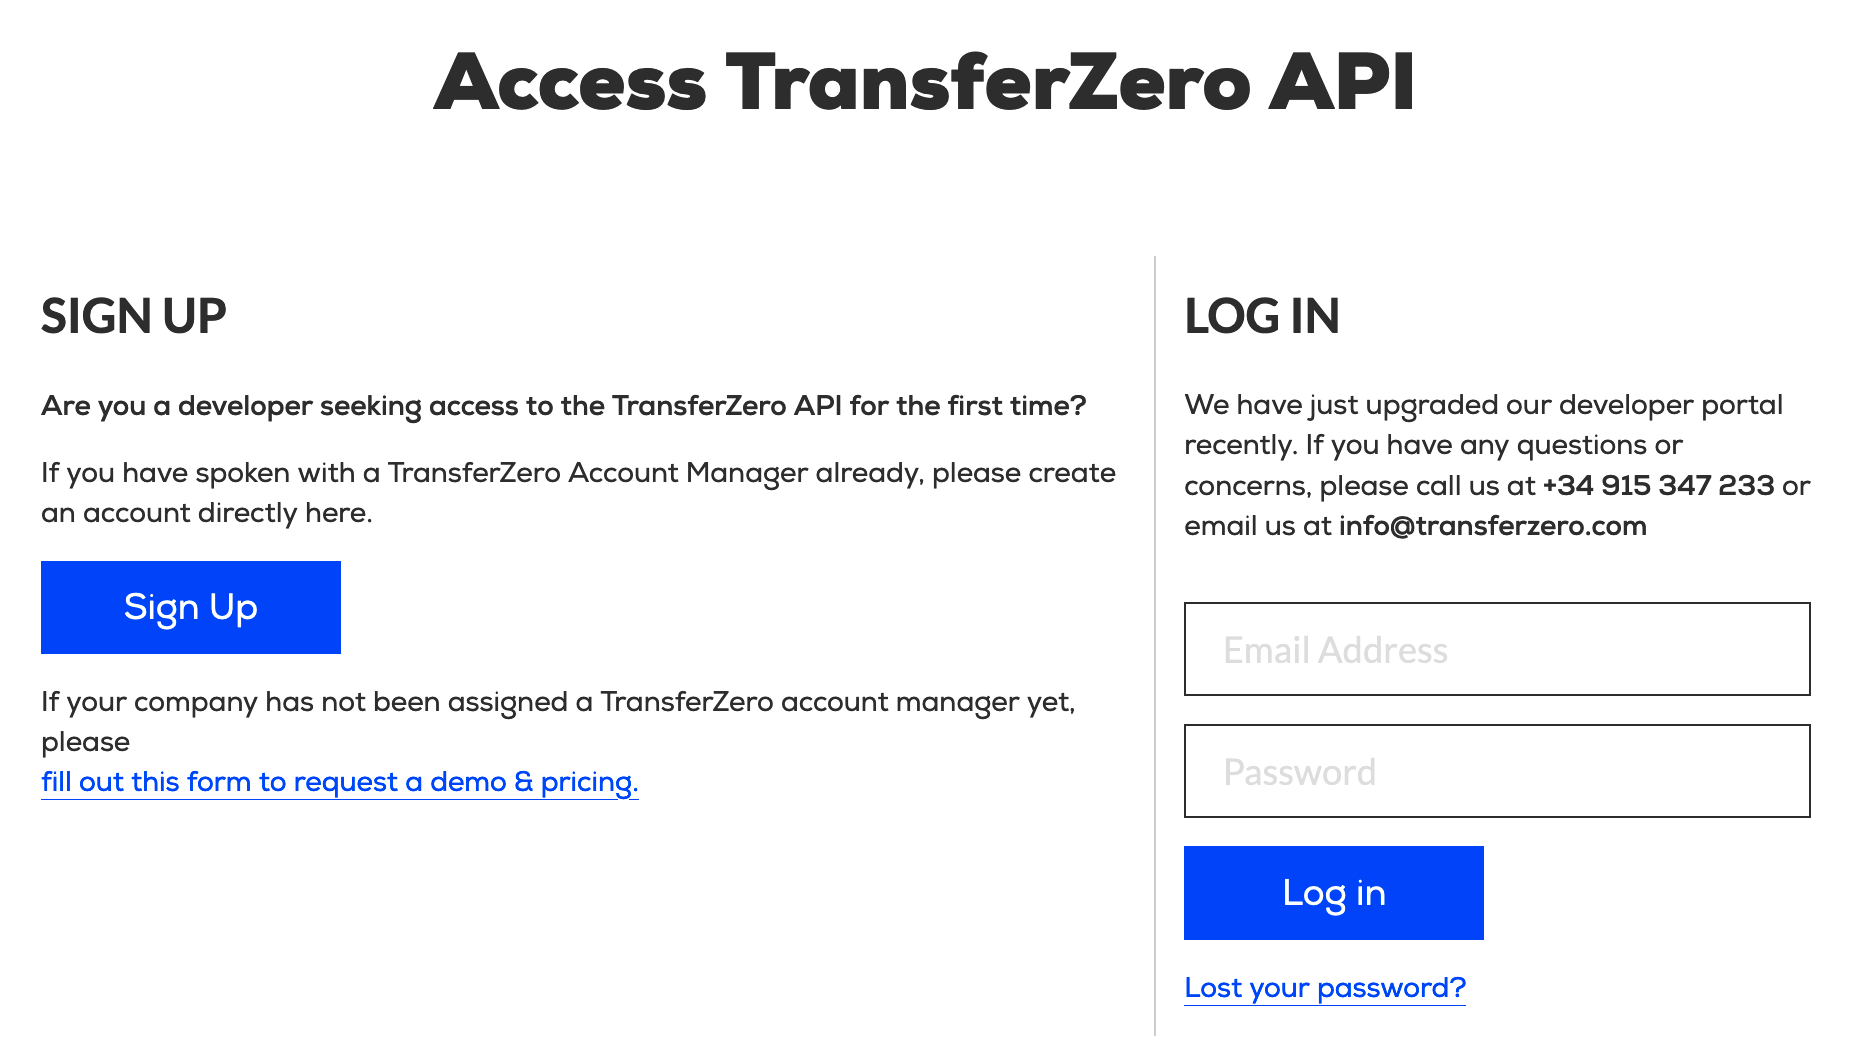
Fill in your personal details and register for a new account. Once registered you will also need to enable Multi-Factor Authentication. If you don’t have yet you need to download and install a TOTP application. We suggest either Google Authenticator or Authy which you can find in both the Google Play Store for Android and Apple Store for iPhone devices.
Warning! MFA is mandatory on all accounts. If you lose access to your device you will need to contact us with proof of identity for us to reset MFA on your account. If you register an account which will be shared with multiple people make sure that you set up MFA in a shared way. 1Password, LastPass and BitWarden are well known enterprise password managers allowing MFA TOTP code sharing within an organization.
After registering successfully you will be able to create a new organization on the next screen. Please make sure to fill out your organizational details correctly, as this will be used for compliance reasons afterwards.
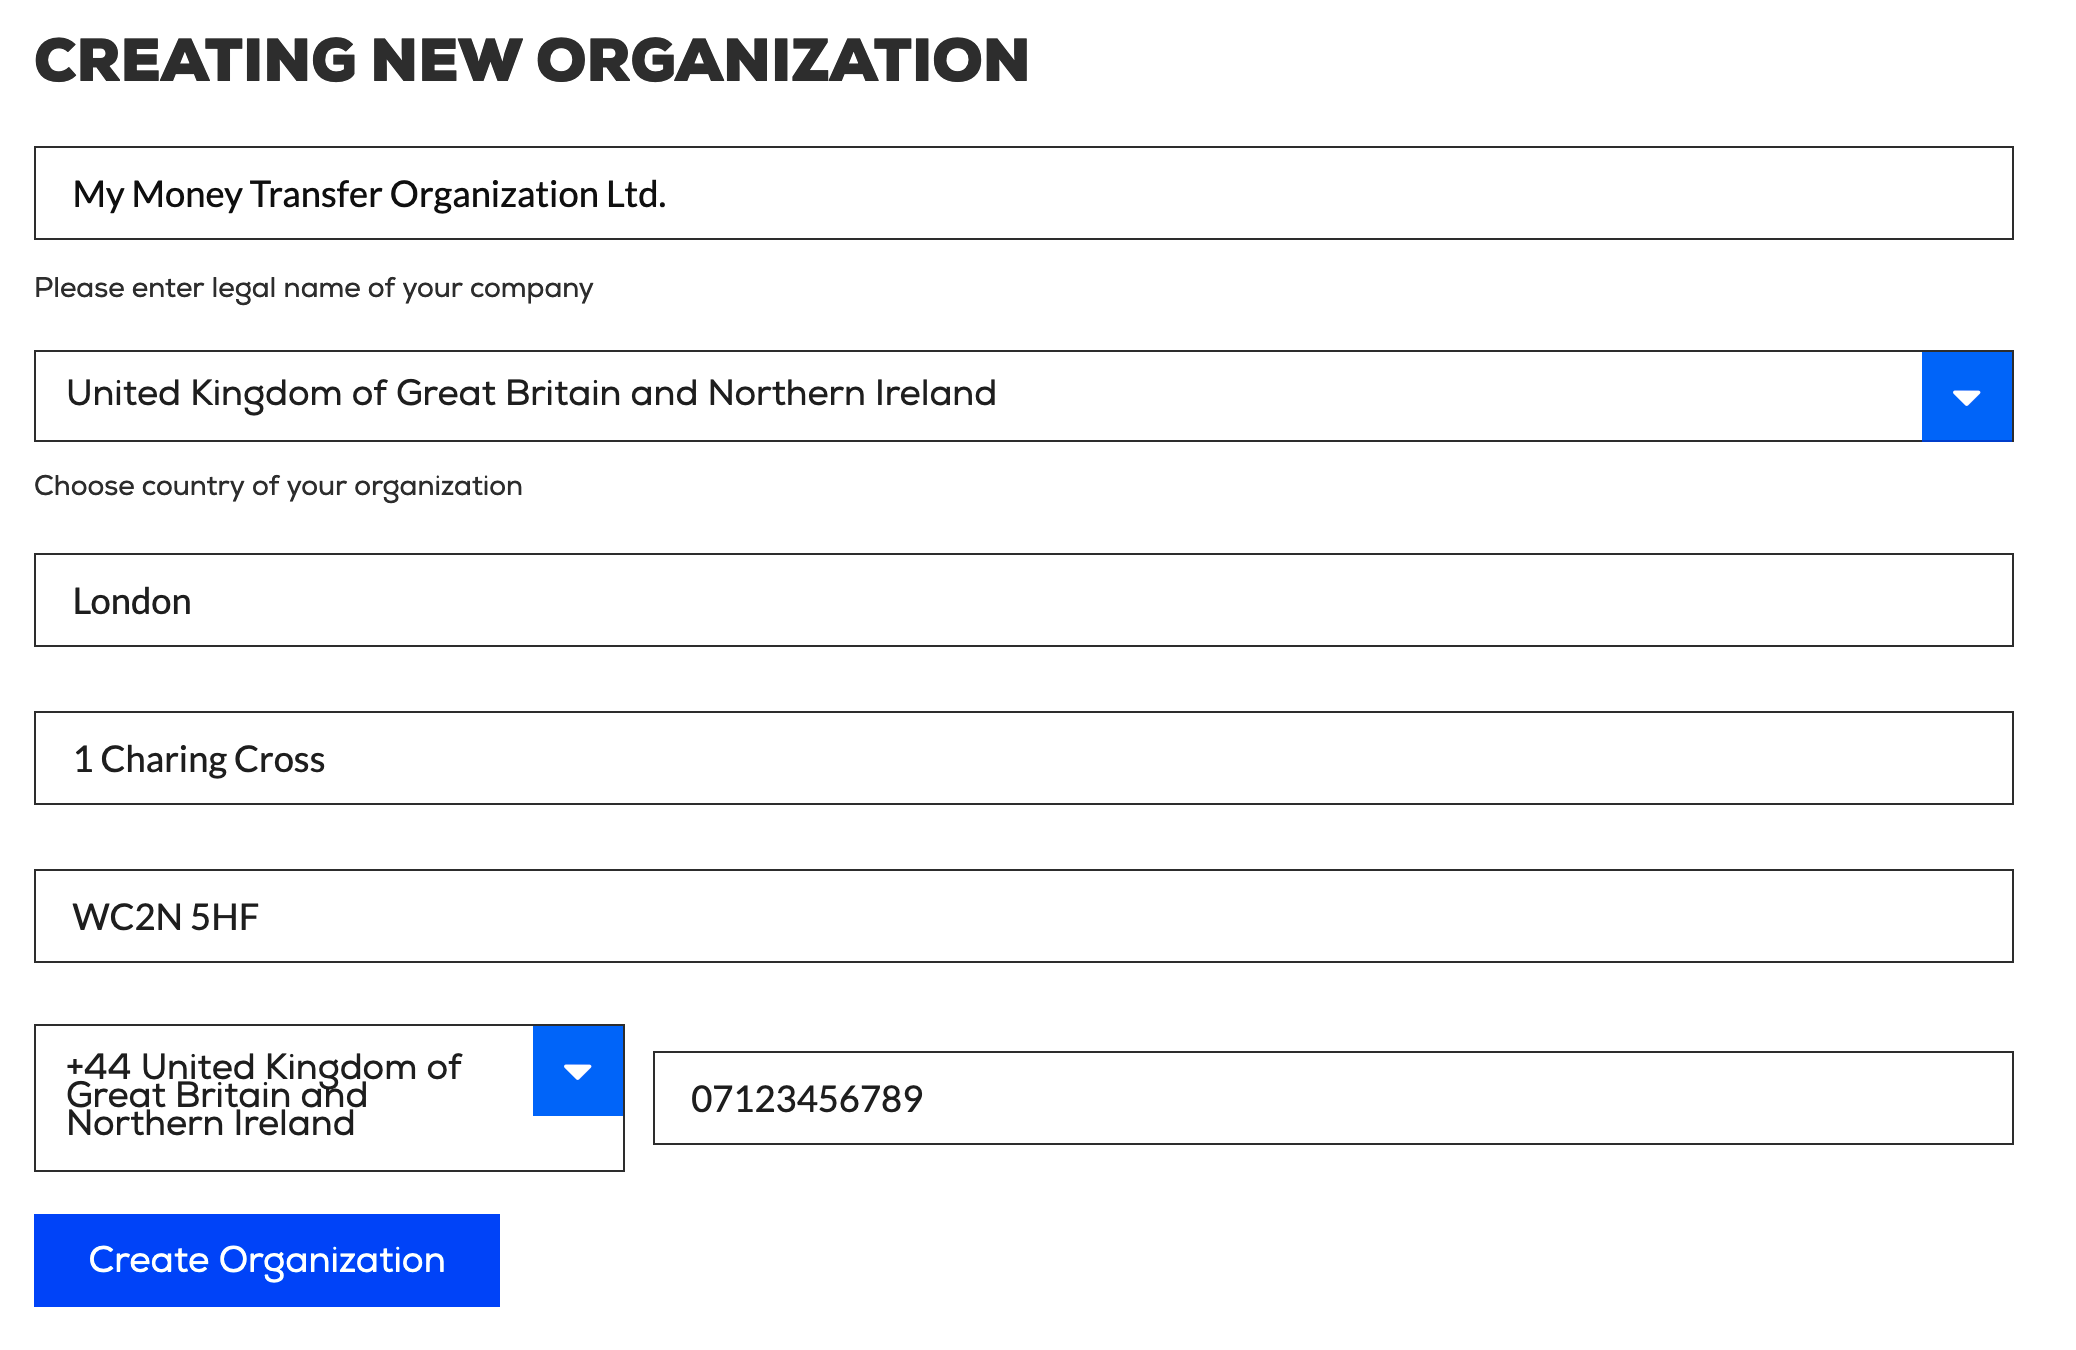
Warning! If you need to change any of these details later you will need to contact us.
Inviting new users
The user who registers for the account will become the administrator who has full access to the system. They are also able to invite new users with limited access as well. To invite new users first click the “API” button then on the left hand side “Invite Users”.
Warning! Due to a technical limitation if you have already been approved for the Live system make sure to invite users on the Test environment. Users invited on the Test environment will have access to both Test and Live systems. There is currently no option to invite people for only the Test or only the Live environment.
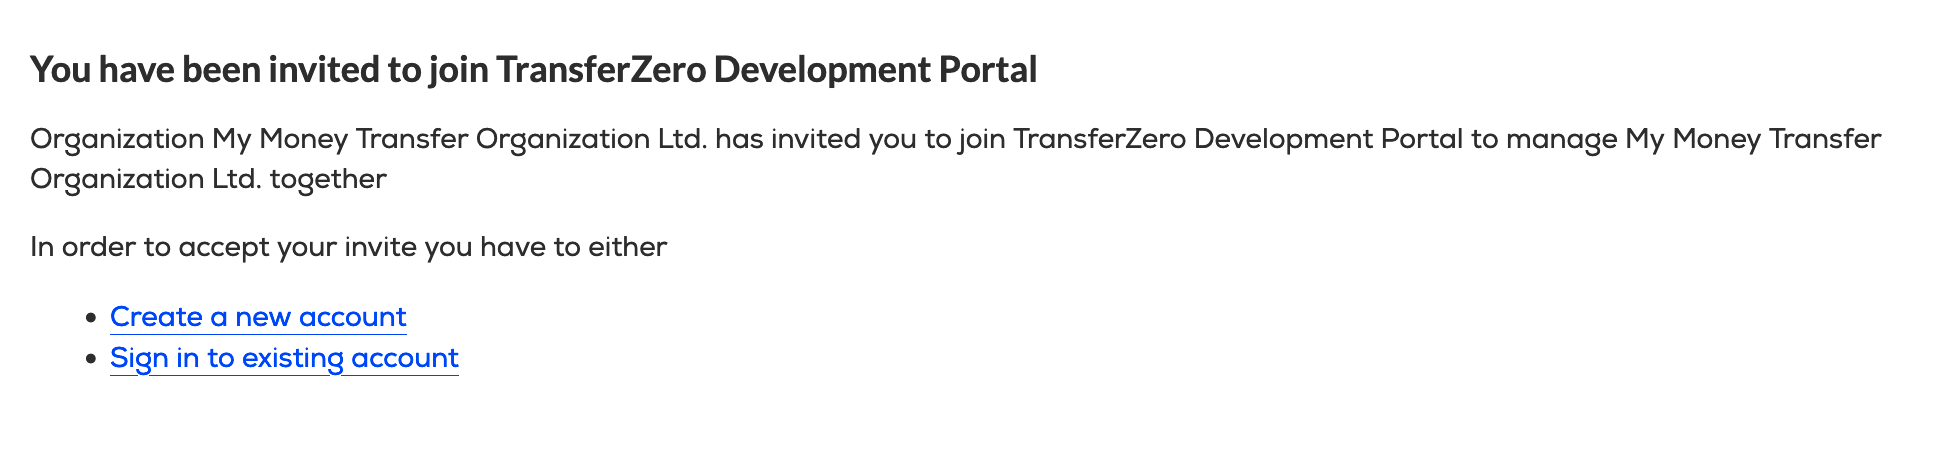
On the Invite Users page make sure to fill in the email address for the user and then click “Send Invitation”. Once the invite is sent it is also advised to set up the permissions for the user (see below for details). The invited user will receive an invitation in their email. Once they receive the email and click on the invite they will either need to create a new account, or if they already have one sign in as that user. When registering a new account make sure the email address used is the same as the invite, otherwise the invite will be invalidated and need to be re-sent!
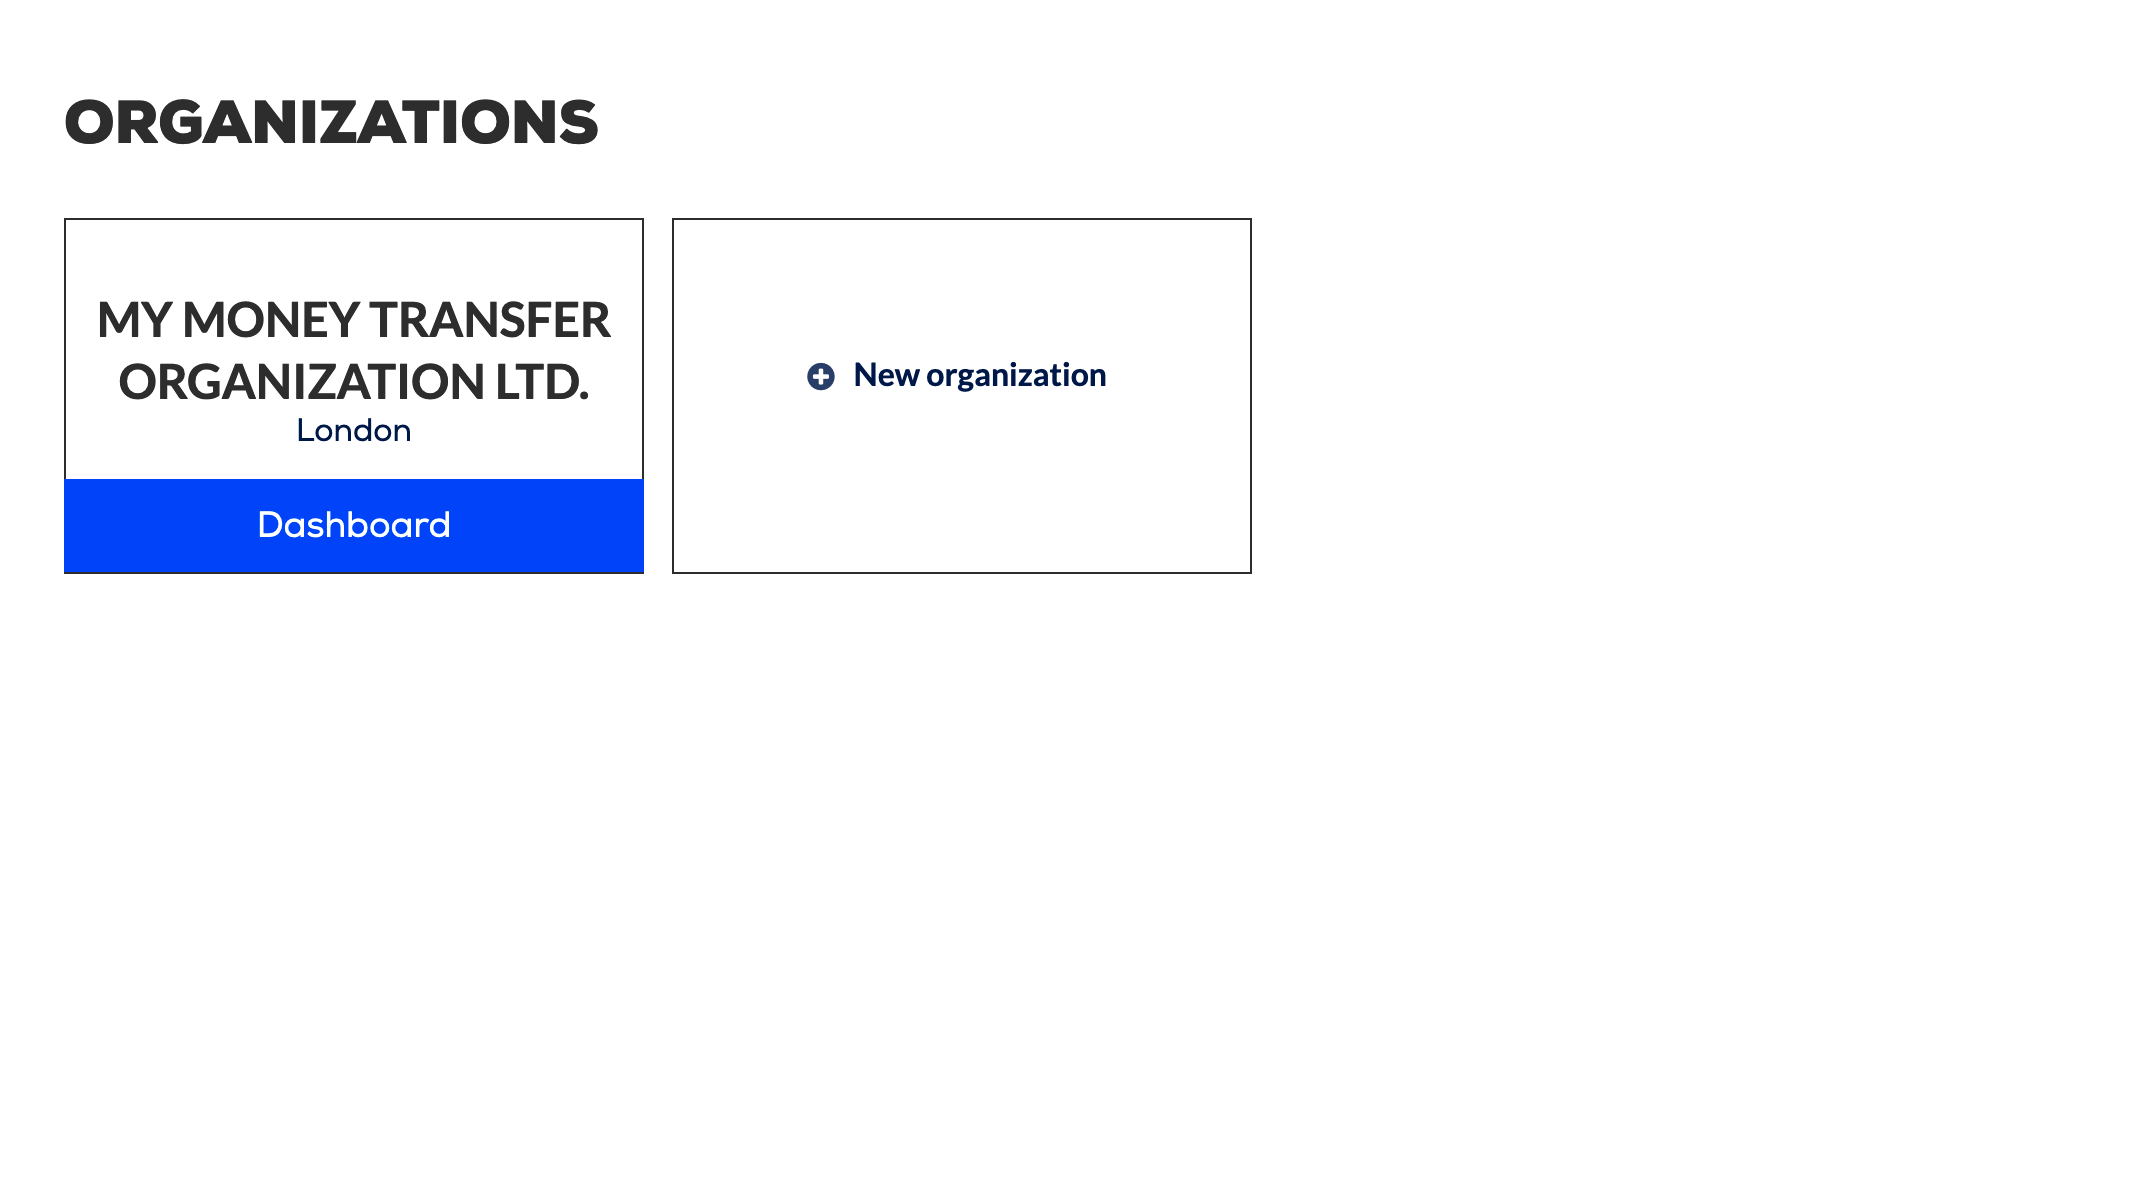
After registering and logging in the new user will have access to the organization as well:
Features
Once clicking on the relevant organization you will able to access the following features
API

The API tab contains the technical details of the integration. Access to various details on this tab can be changed on the “Invite Users” page:
Webhooks/Read: This allows the user to check what webhooks (callbacks) are registered for the account.Webhooks/Write: This allows the user to create a new webhook (callback) against the organization. You can check our webhooks documentation documentation for more details.Statistics/Read: This permission is not currently usedLogs/Read: This allows the user to check recent activity logs that were done against the account on the Logs pageApi Keys/Read: This allows the user to check the API Key and Secret. Note: All activity in our system can be accessed through the API, hence anyone having access to the Key and Secret will be able to access all features of the integration! Make sure to keep these values secret!Api Keys/Write: This allows users to revoke Api Keys in case they get compromised. After revoking an Api Key please contact us immediately so we can recover your account and help with the audit processRoles/Read: This allows the user to check who is registered to access the organization. Note: The list will not include the administrator account which has access to the system explicitly.Roles/Write: This allows the user to invite new users and change the roles for any of the users. Note: Users with this permission can change their own permission as well effectively having the ability to become an administrator.
Dashboard

Regardless of the access given above, all invited users - even ones that have no permissions assigned - have access to the “Dashboard” page.
The dashboard page currently shows the following details:
- Your currently available balance on all of your accounts
- A list of recently created transactions.
- A Transaction search box allowing filtering be date and transaction external ID
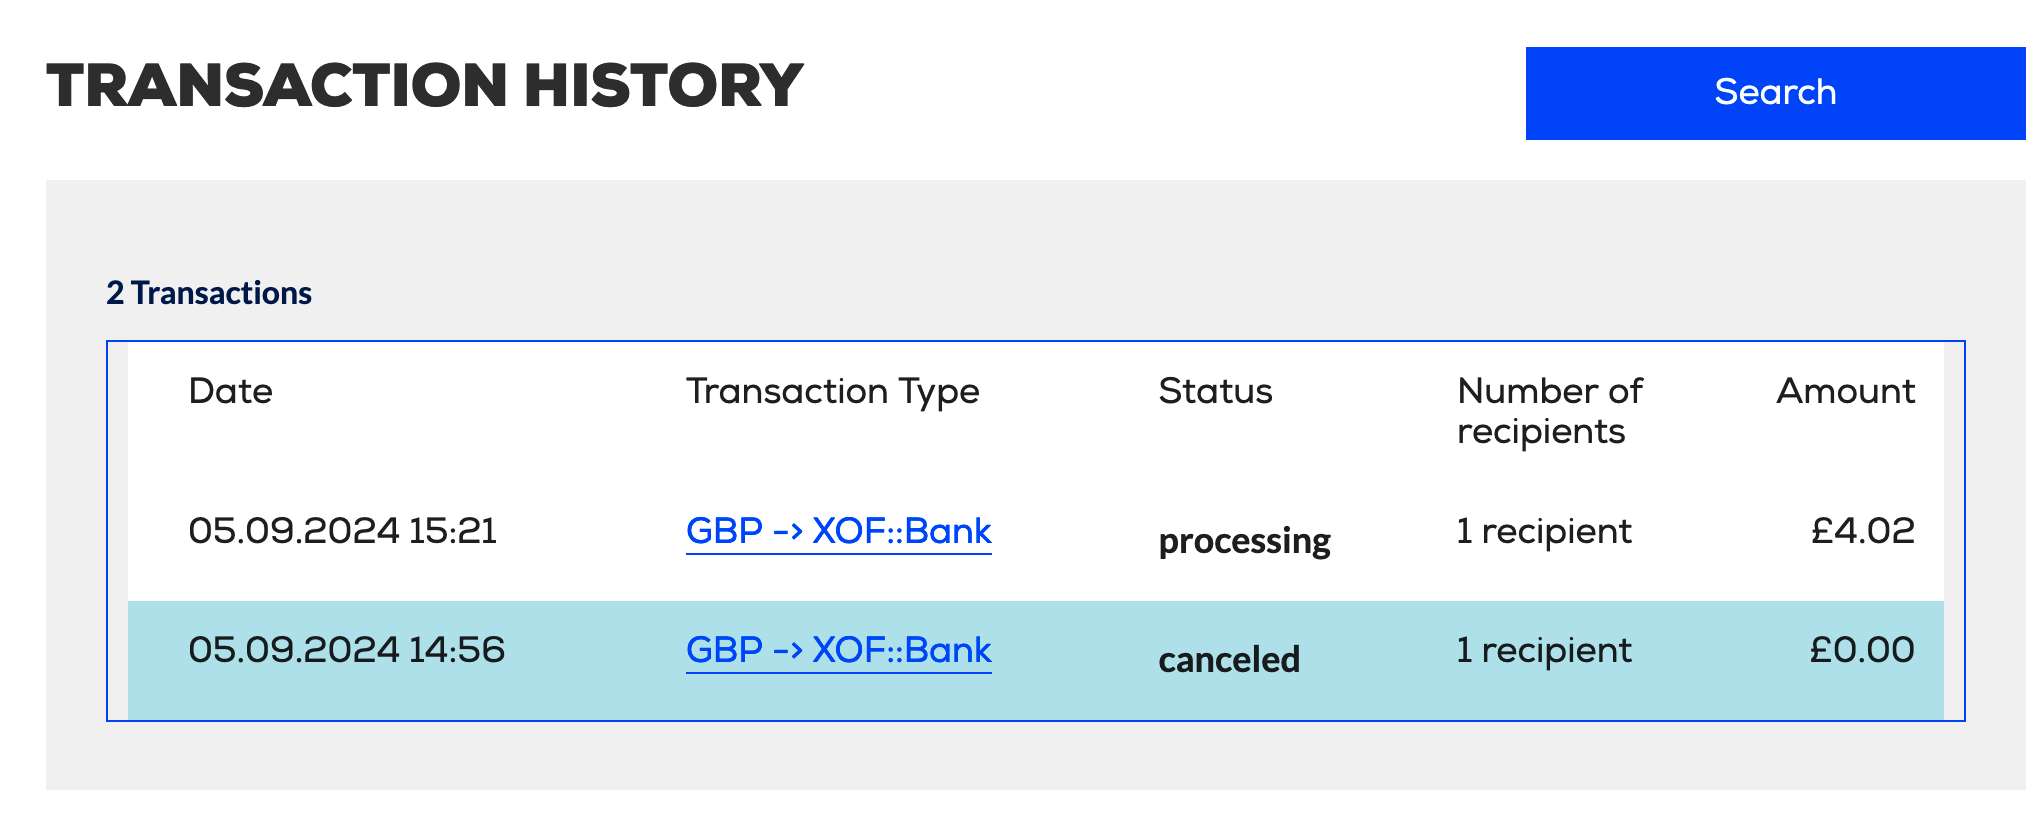
After filtering for transactions you can also click on any transaction for further details:
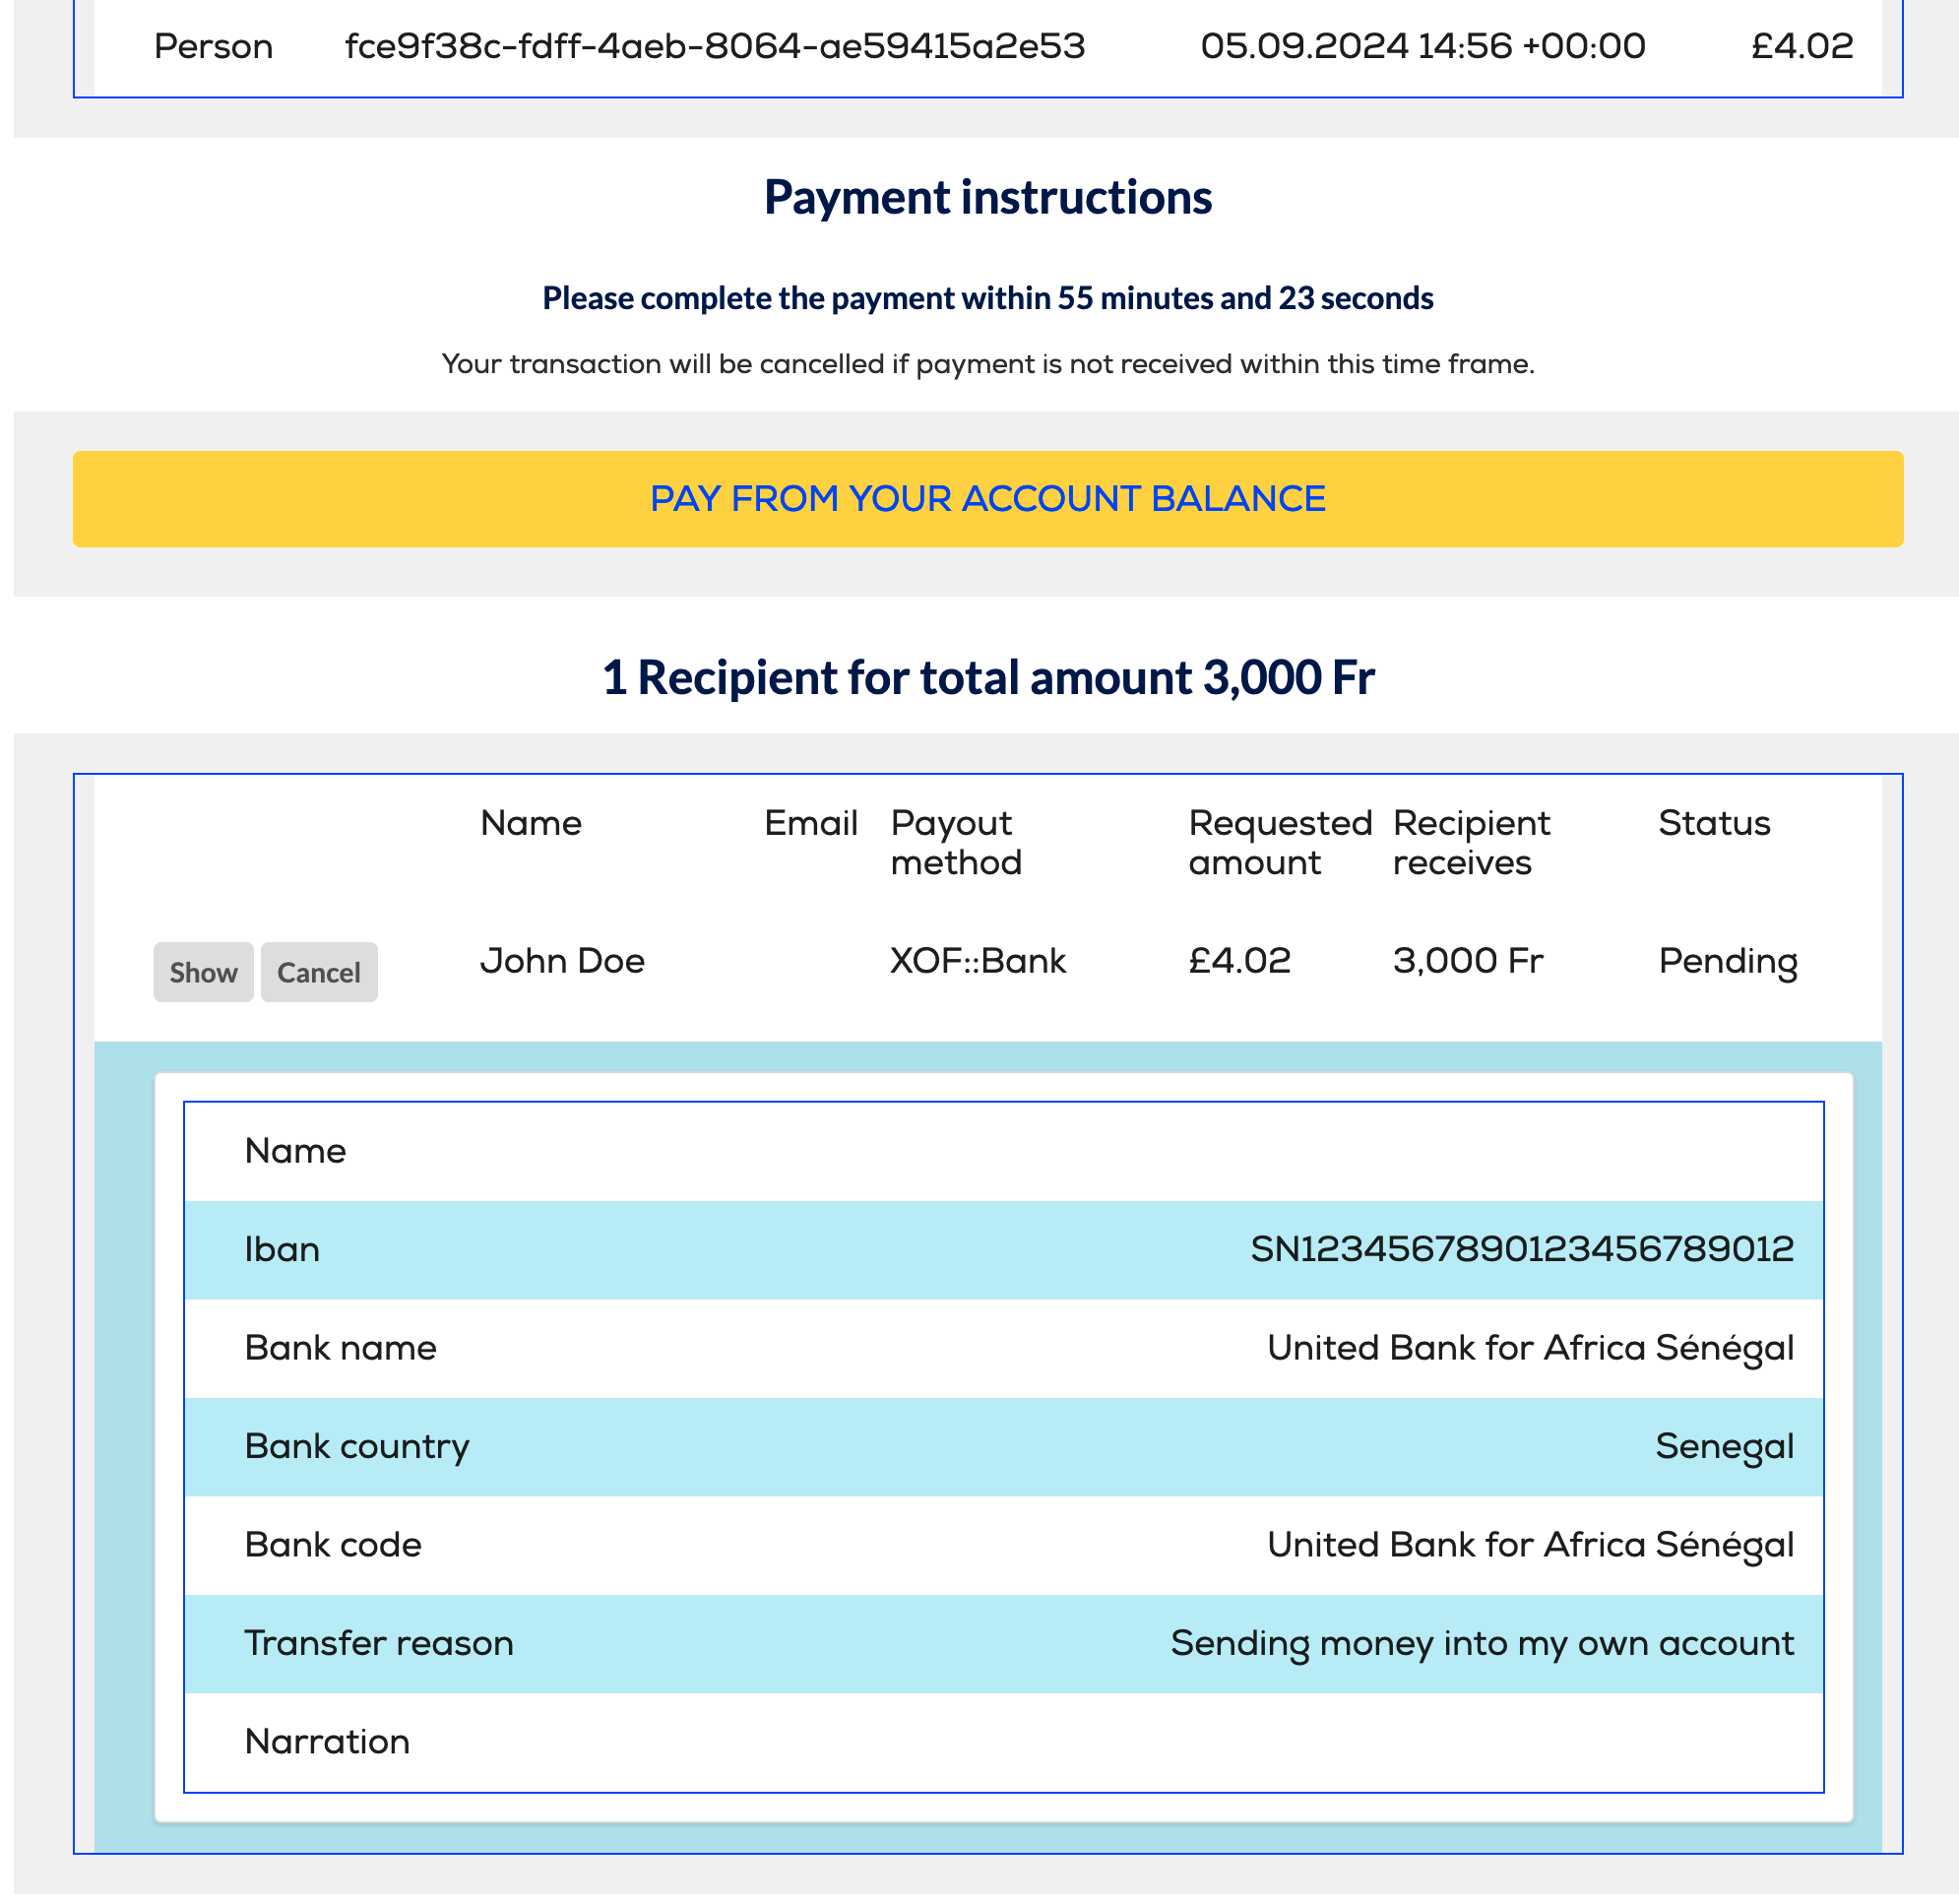
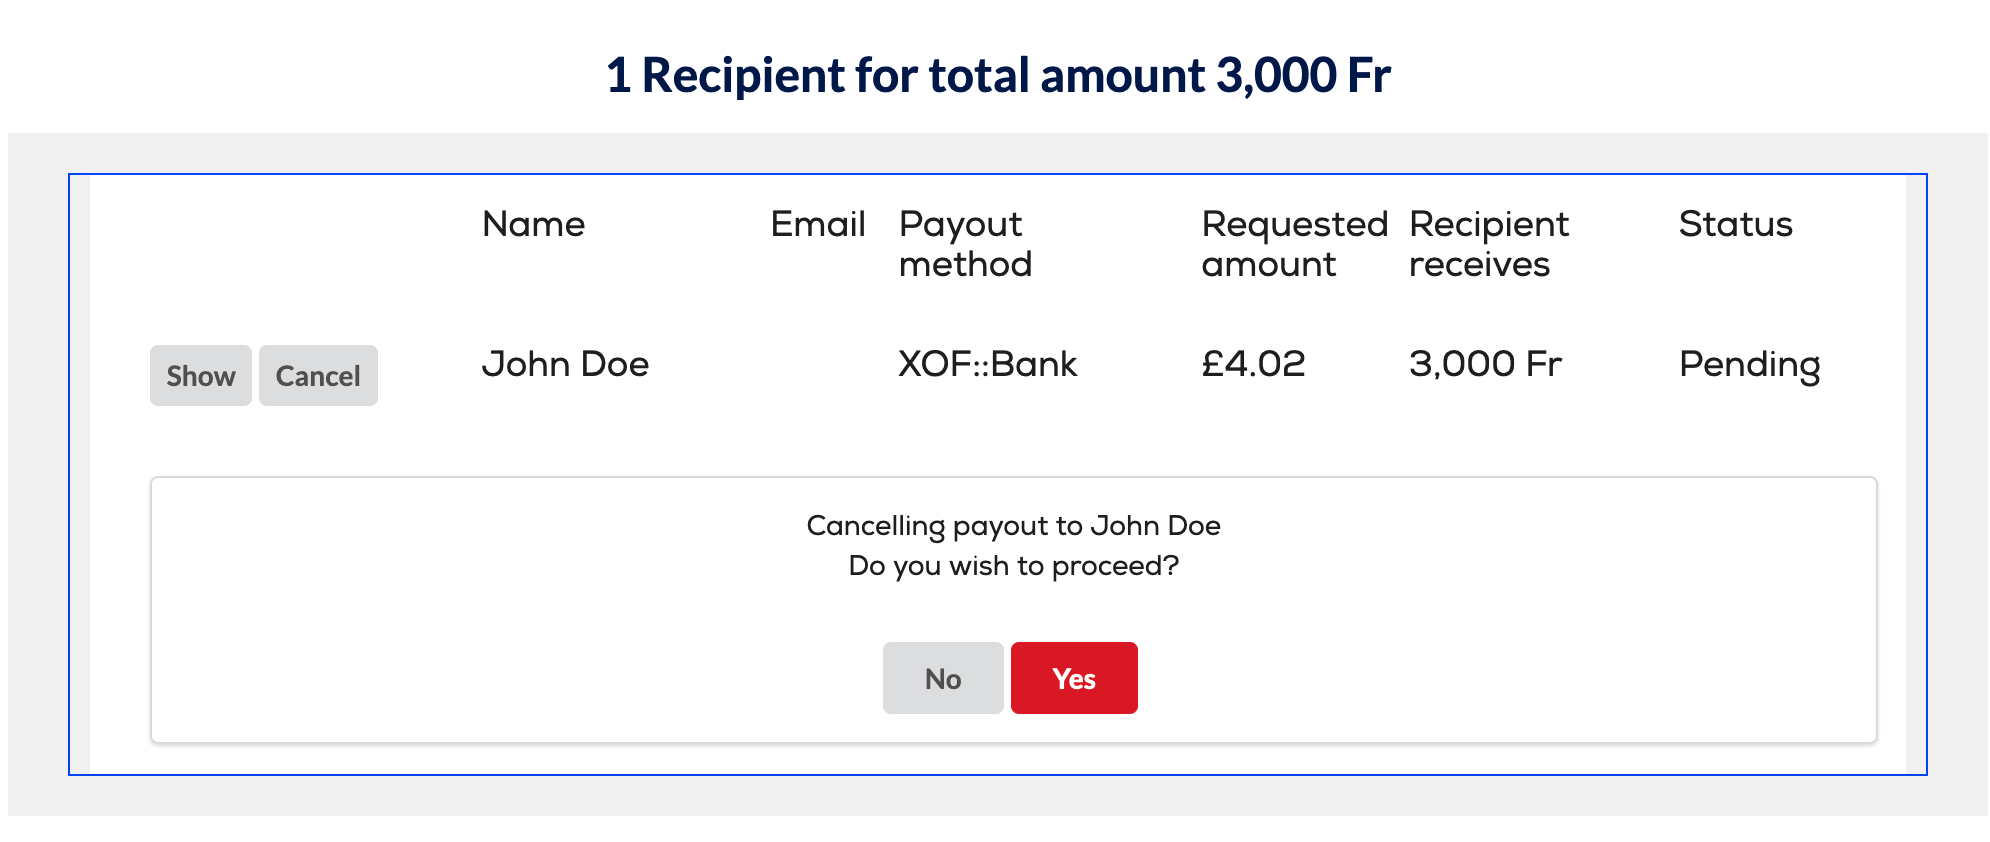
This page will include a minor set of transaction and recipient details. In case there was any error handling the transaction you will also find notes on the errors as well as the ability to send a cancellation request (See screenshot below ). However this interface is not designed for full transaction management, that should be implemented on your end using the API.
Reports

Regardless of the access given above, all invited users - even ones that have no permissions assigned - have access to the “Reports” page.
The reports page allows users to download the monthly transaction and account reports in CSV format. For more information on the contents of this file and examples please contact us.